A Payphone for Shelters

Providing shelter for people struggling with economic and social challenges is its own struggle. Private, charitable, and community resources come together, bringing their own policies and practices that guide what they will and will not contribute or allow. These constraints can require novel, unorthodox solutions to meet participants’ needs.
Once physical protection and nourishment are provided for, shelter operators turn their attention to community and communication. The ‘three pound universe’ between our ears is amazingly resilient, and even when it’s thoroughly dysfunctional or damaged it makes us very social creatures. Humans need deep, meaningful connection with others.
In the past, everyone no matter their circumstances had easy access to phone communication, that the telecommunications providers had to offer as a condition of their monopolies. Now, the public payphone has all but disappeared with no contemporary replacement. Mobile devices are widespread but not ubiquitous, and mobile phone service is, in Canada, notoriously expensive.
Comparatively, Wi-Fi is dirt cheap, as is VoIP calling. Shelter owners or operators can offer commodity Wi-Fi as a valuable amenity for residents and staff alike. Some residents will have their own devices, but for others, access to a public computer or even just an internet “payphone”, for free, can encourage conventional, predictable connections with the outside world.
The I.T. workers who stand these services up always prefer wired connections. With the unique physical demands put on shelter structures, the intersection of policies and practices of the partners can dictate “wireless only” connections.
So we adapt to meet this constraint: we developed a workable formula for a reliable, convenient public phone service via Wi-Fi that is quick to build and quick to deploy.
Hardware
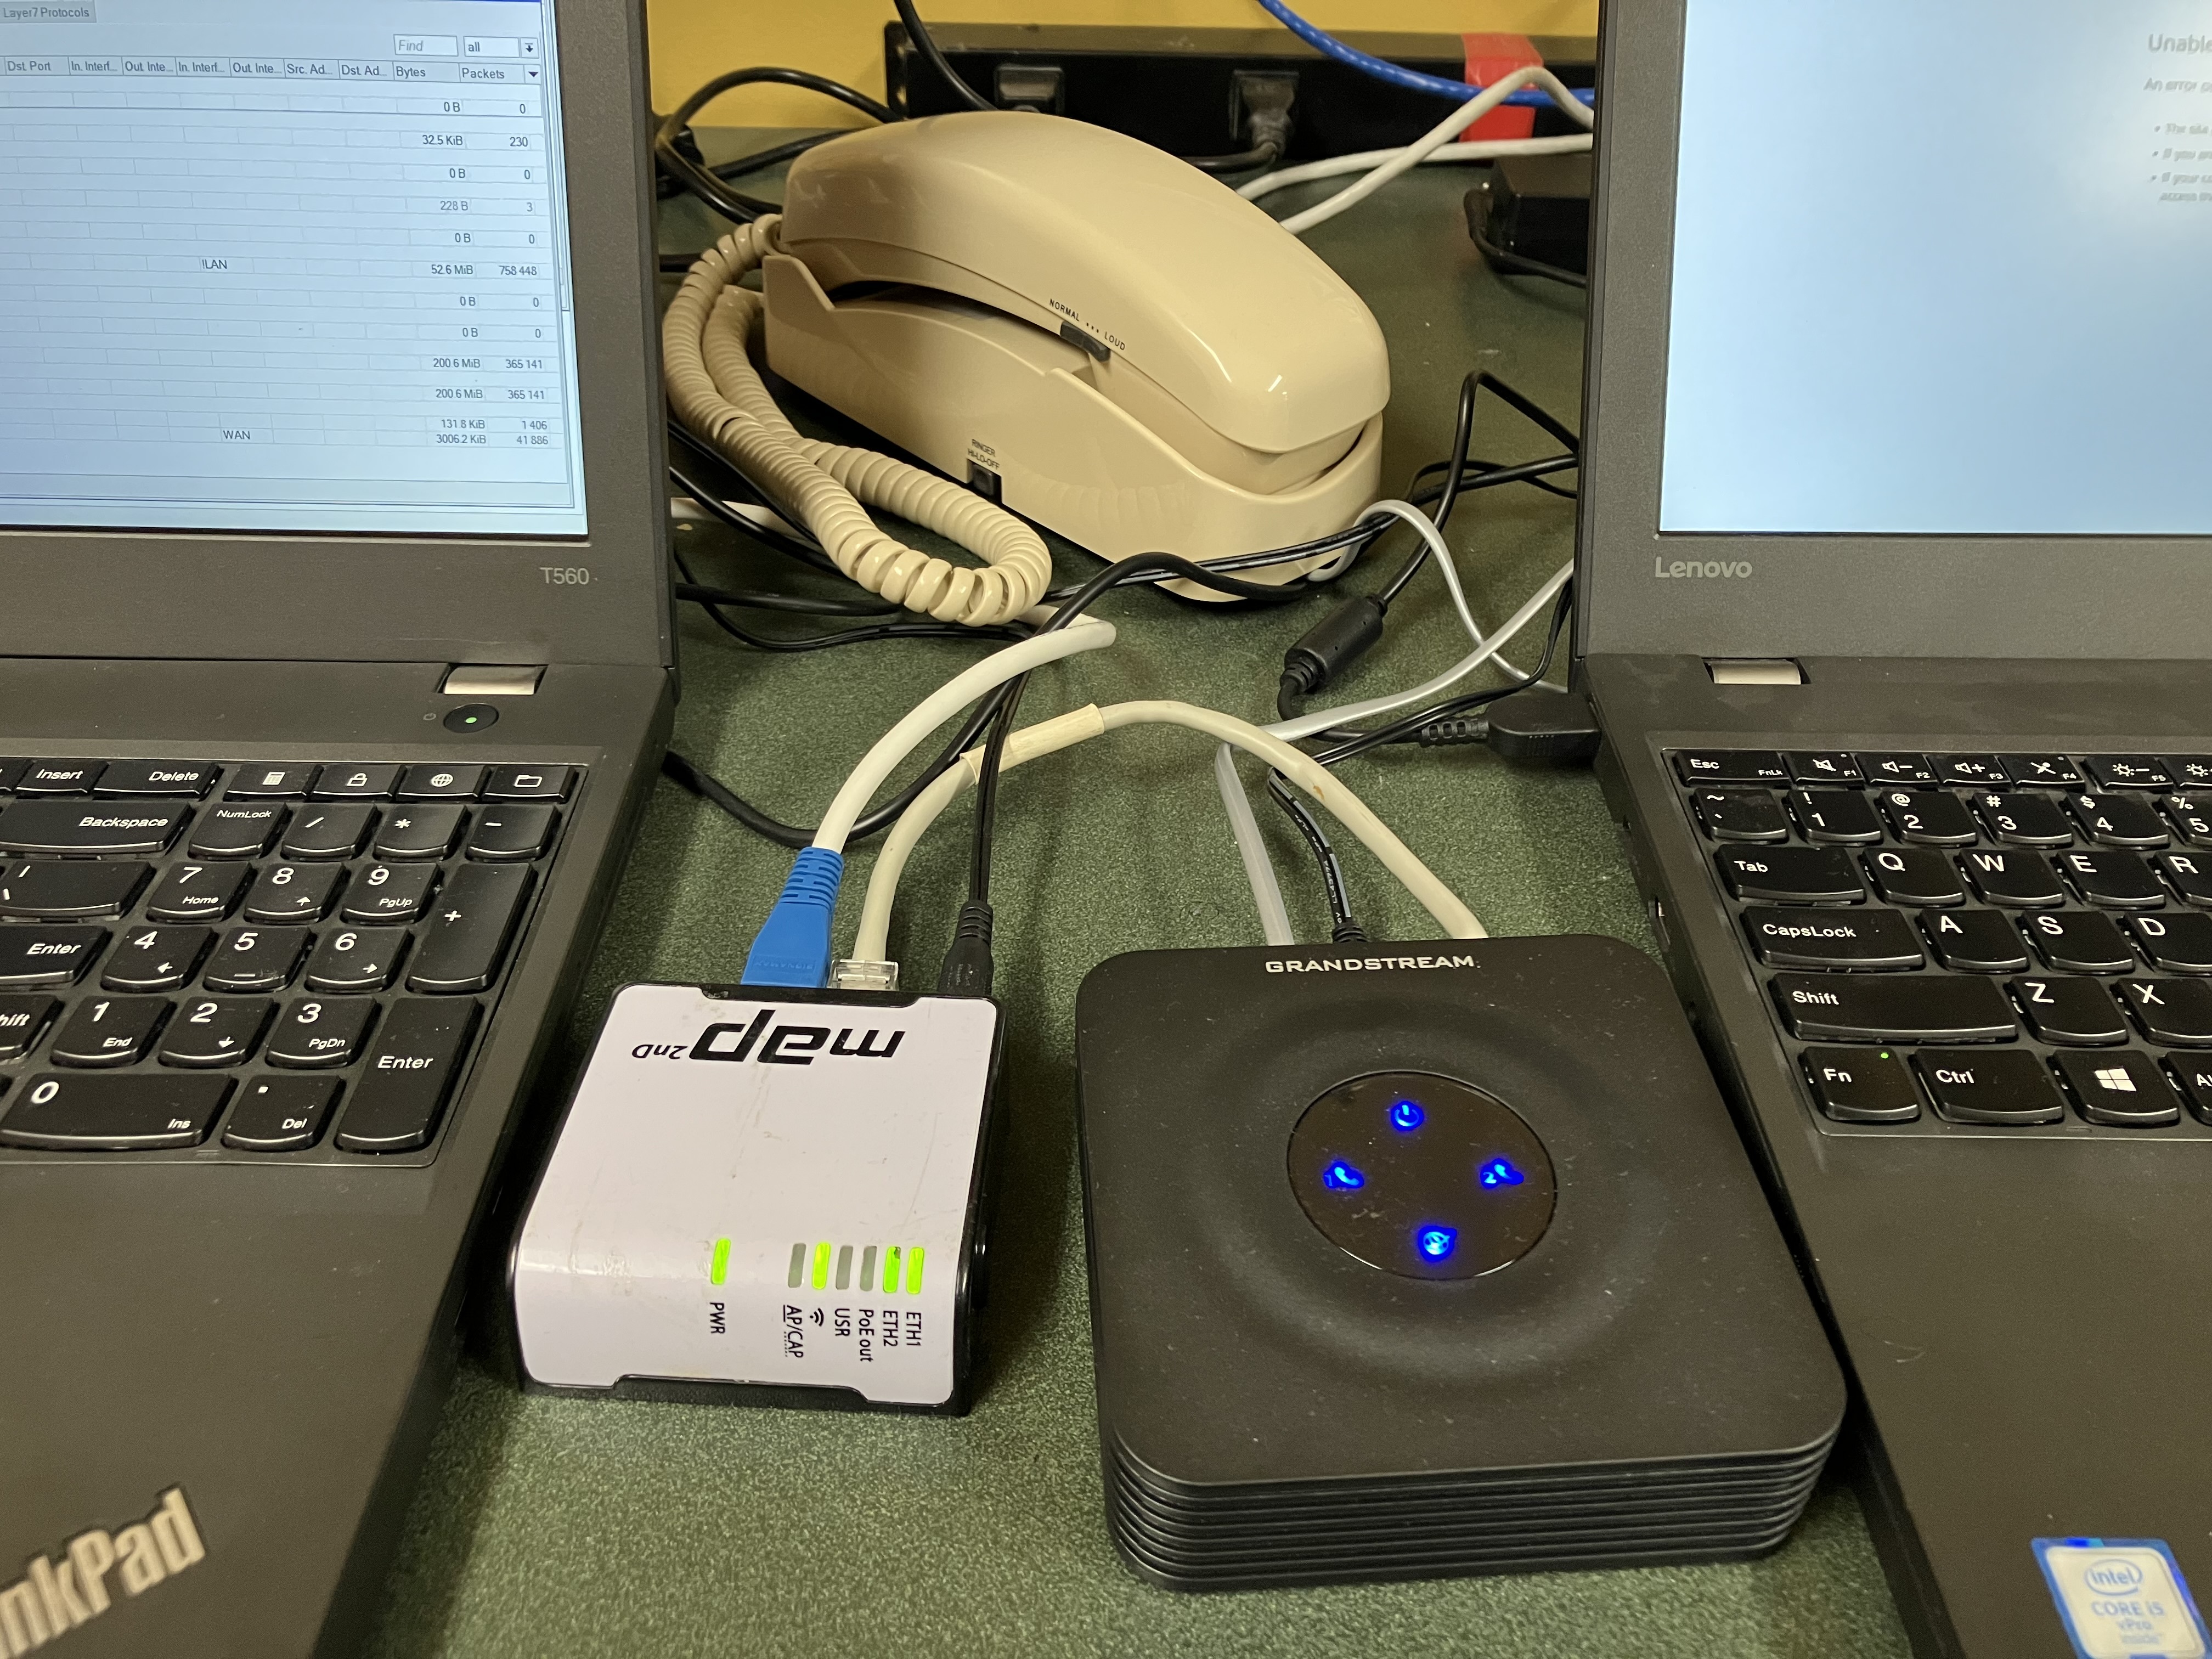
Shelter residents place calls using a heavy plastic touch-tone handset, which we buy in bulk at a local surplus store. We will use donated home phones when they come in for recycling, but they often have a distracting number of feature buttons that set the wrong expectations for the user.
We use a Grandstream Networks Analog Telephone Adapter (ATA) to place the phone calls over VoIP. It has two phone extension jacks (FXS, always confusing), so we can host two handsets. We have had other ATAs donated, but we’ve discovered that changes in SSL/TLS over the last few years have obsoleted some devices of even recent vintage; we’re not experts in the finer points of the protocols, so we stick with new products.
To connect to the internet, we have had good luck with a MikroTik mAP devices configured as Customer Premises Equipment (CPE). The devices don’t have any wasted hardware: two or one Ethernet ports for the ATA. We have used the two port model to develop the system interactively, but once we can reproduce the formula reliably, we have used the single-port model to eliminate an opportunity for misuse.
Wi-Fi Connection
We configure the mAP as CPE using MikroTik WinBox (with much practice; if you know, you know). WinBox provides reliable access in the layer 2 MAC address mode, and gives as much granular control over the router’s state as anyone could want.
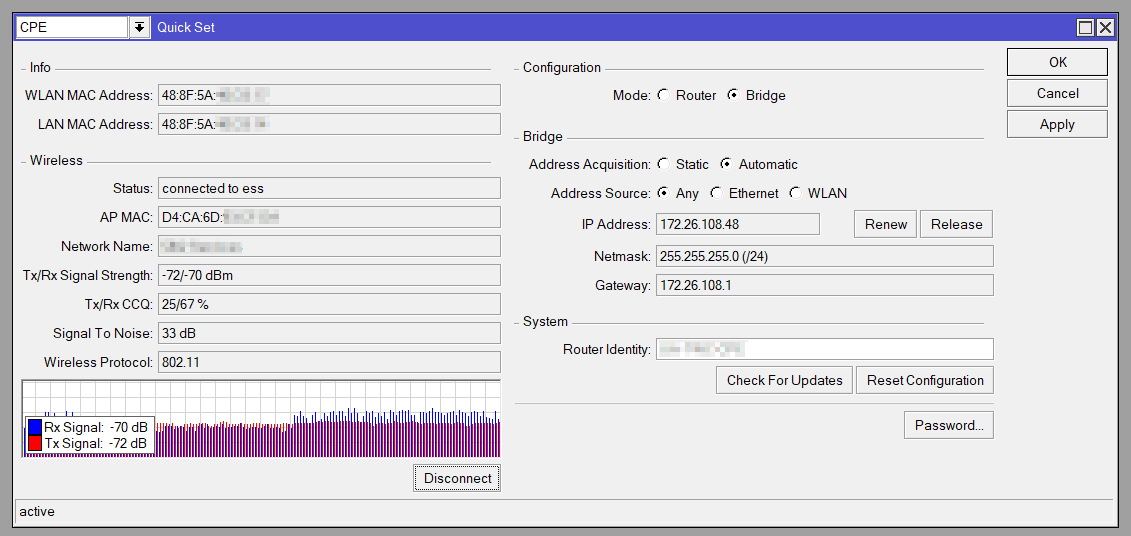
It’s common practice to use WinBox Quick Set to do the first few customizations:
- select CPE mode,
- set the device’s name and admin account password,
- select the (I.T. lab) Wi-Fi SSID and supply its WPA2 password,
- configure the device as a Bridge,
- ensure the device uses the bridge as its IP interface,
…and then never touch this screen again except to do RouterOS update checks. As the configuration changes elsewhere in WinBox, this screen becomes less useful.
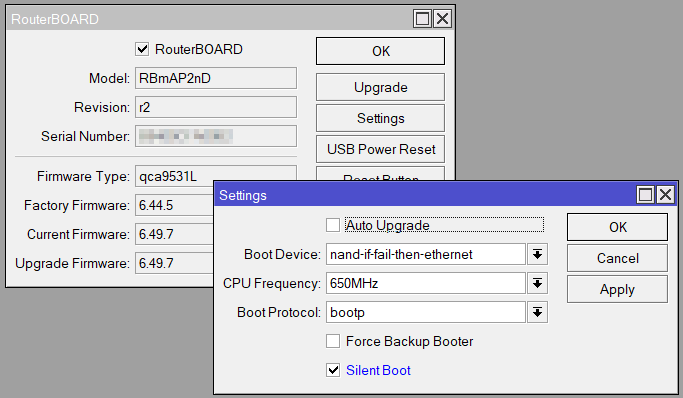
We do system updates from the Quick Set window, and then choose System->RouterBOARD to do firmware upgrades. One useful setting in RouterBOARD settings is “Silent Boot”, which disables the high-pitched beep whenever the MikroTik boots (not all models). We leave the system LEDs on because the device will be living in an opaque box, and it remains helpful for I.T. to know its status at a glance (if the devices were in plain sight, I’d disable them).
We disable the DHCP server first thing, because it is left running even when we switch the mAP to CPE bridge. We’re relying on the facility’s Wi-Fi to supply both the mAP and the ATA with IP addresses, to avoid double NATting. We verify the DHCP client is taking an IP address for the bridge device (we will try for a static mapping from the facility, but sometimes the coordination just doesn’t happen).


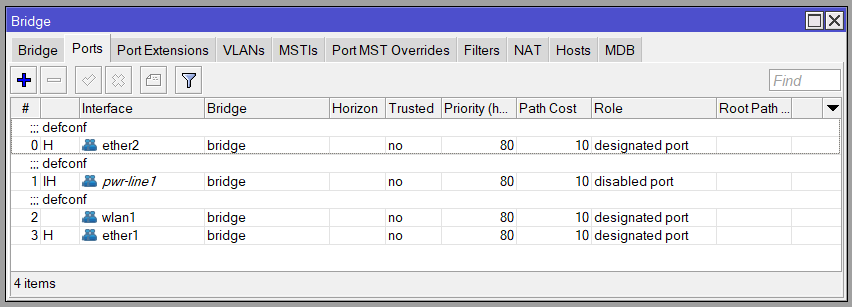
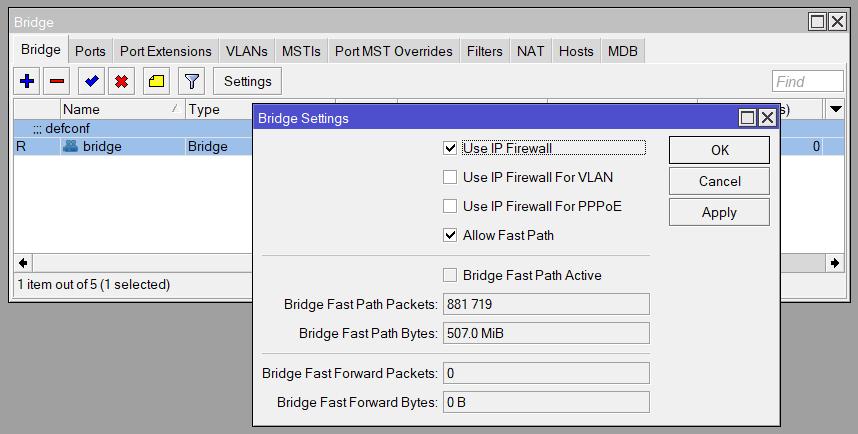
Broadly, we’re bridging the wlan1 and ether1 (and ether2 if present) network connections, to connect the ATA to the network. The bridge configuration can be confirmed from the dedicated Bridge window, on the Ports tab.
We still use the IP firewall to block incoming and forwarded connections, to protect the mAP and ATA from external access. Economic status is no predictor of technical literacy, and potentially anyone at the shelter might be willing and able to poke around (care to know how we know?)
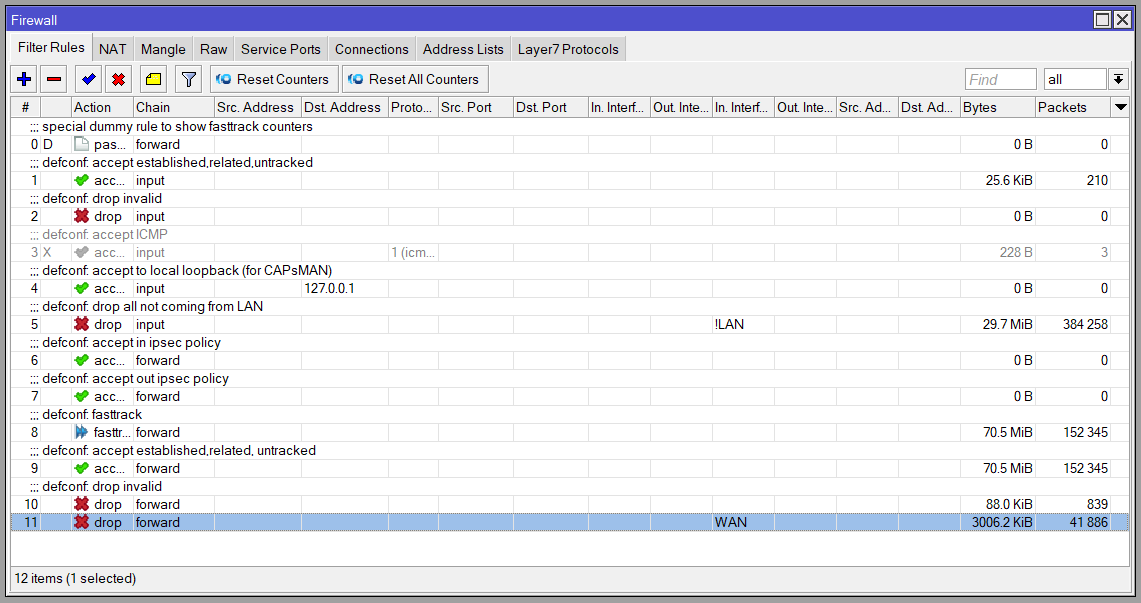
The firewall is largely default configuration. We can disable the ICMP (input) rule to help the mAP disappear a little more, and add a new rule at the very bottom blocking forward traffic originating on the WAN interface list (the wlan1 interface). A rule just above allows forward traffic over established connections, including those initiated by the ATA itself.
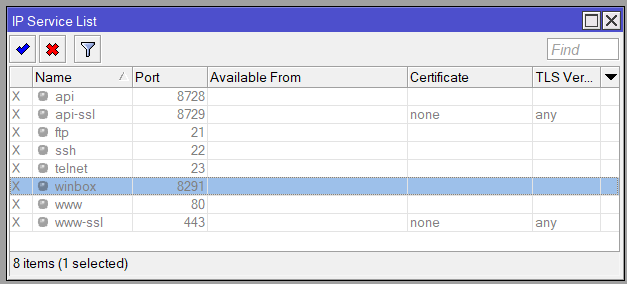
Under IP->Services, we turn off all available IP services. This does not interfere with WinBox over a MAC connection, and protects against misuse in the field.
One setting specific to MikroTik/mAP we learned to double-check is the Wireless->Interface->Mode. Some of the modes are MikroTik-specific, and, when we used their devices both as CPE and lab APs for development, we got different results deploying the mAPs into non-MikroTik environments.

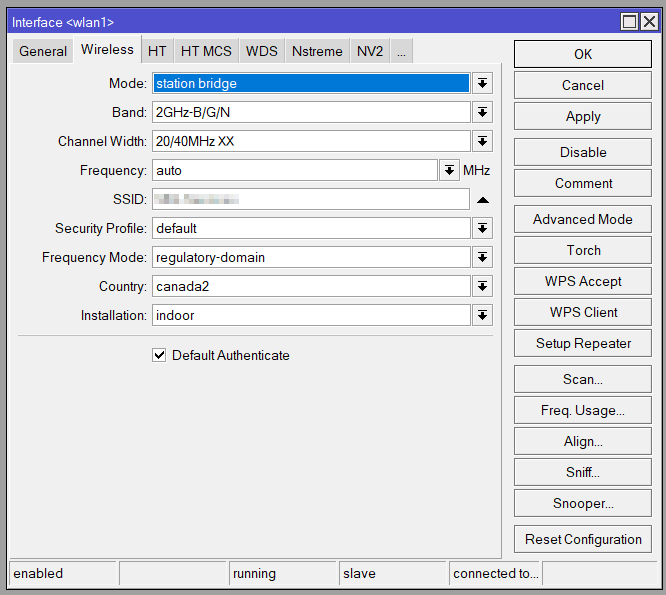
MikroTik’s approach to WLAN security configuration is to create a security profile with the WPA settings (or to alter the default), and then associate it with the wlan1 interface configuration; it takes a bit of practice to build the mental model of it.

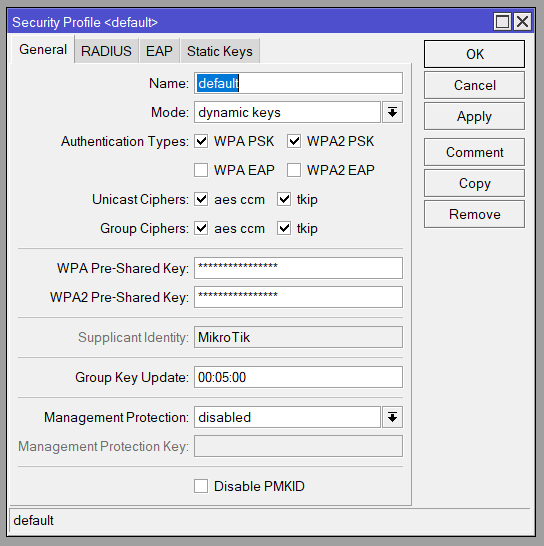
We set the wlan1 interface to its final SSID and password, and usually test it using a lab AP with (our best guesses about) the intended configuration, to ensure it automatically connects, authenticates, and allows the registration of the VoIP lines when power is applied at the remote site.
VoIP Configuration
We set up the ATA to use two separate VoIP.ms subaccounts, one per FXS/handset. The “payphones” do not receive incoming calls (therefore no DIDs are set up).
We use our main corporate number as the Caller ID, to ensure confidentiality. Should an outside caller contact us to reach a shelter resident, we can sometimes make the connection. Under a separate project, we offer a Community Voicemail system for anyone who wants to receive incoming messages.
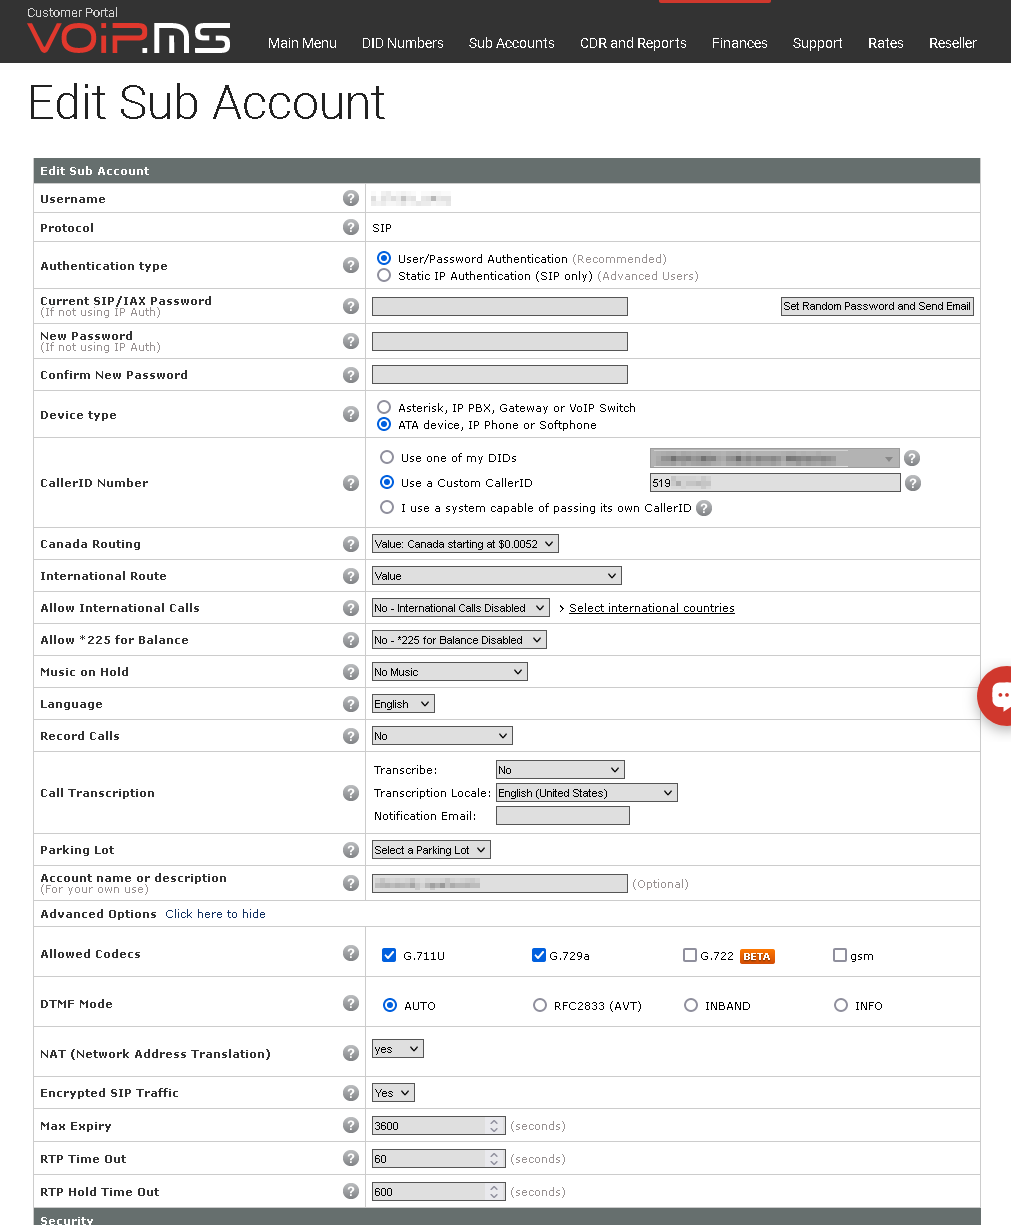
We follow VoIP.ms’ instructions to start configuring the ATA, with good results. There are an enormous number of configuration options in the ATA admin pages, involving codecs, protocol details and timeouts. Setting up other ATAs, IP phones, and PBXes has helped us develop some insight into what the choices mean, but we still have a long way to go.
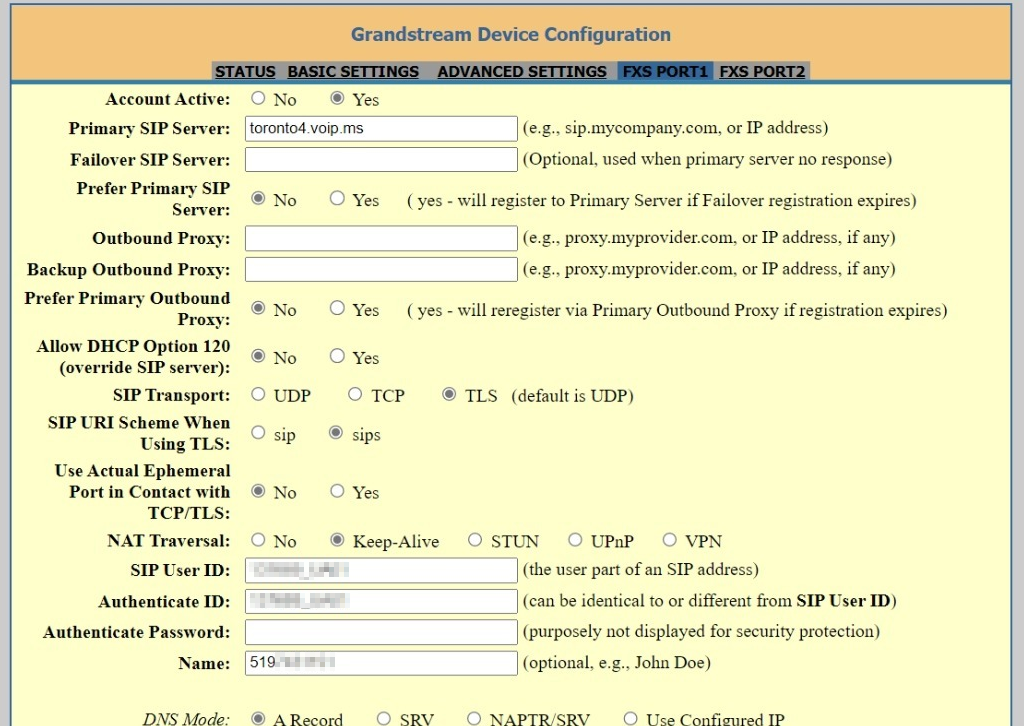
We configure the VoIP.ms subaccounts and the ATA’s lines to perform secure calling. This requires both secure SIP and secure RTP, and the matching configuration on the VoIP.ms subaccounts.

We change the web interface passwords and disable handset access to calling features, considering that anyone can look up default touch-tone access methods for ATAs, or just mash buttons and see what happens.
(Oversize screenshot attached as appendix, below.)
Though the default Dial Plan works, we set it to disable 900 calls and 7-digit dialing that is no longer applicable in our area. The dial plan helps the ATA determine when a dialed number is complete; the ATA waiting for other digits before dialing the call makes the phone seem broken, which is a pain point in an environment that doesn’t need any more.

We haven’t needed to disable the MikroTik SIP helper (ALG), but doing so is a frequent prescription for difficulties with one-direction audio and other VoIP problems.
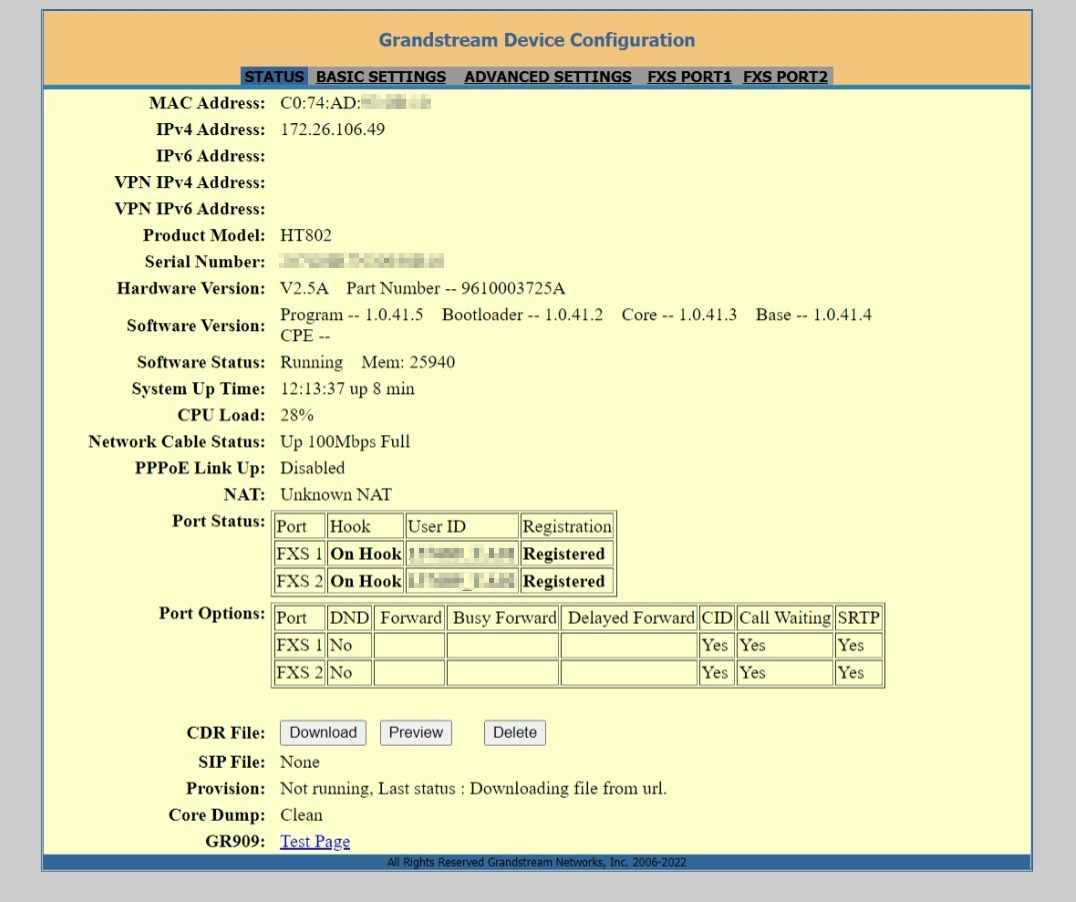
If all goes well, the ATA connects to the internet via the mAP and reports registration with VoIP.ms, and outbound calls are reliable and clear.

Deployment
We take a backup of the configuration from both the ATA and mAP, though we often simply recreate the configuration from scratch for the practice and to implement new learnings.
We package the ATA and mAP and a power bar in a plastic tub that originally kept bulk cooking spices from our community kitchen. The enclosure is big enough to avoid overheating, and utilitarian so that it blends in well with the clutter of a shelter’s office or other environment (that isn’t always so secure). We drill holes in the tub for the power connection and for handset wires. We do the best we can for strain relief, knotting the phone wires or another improvised technique.
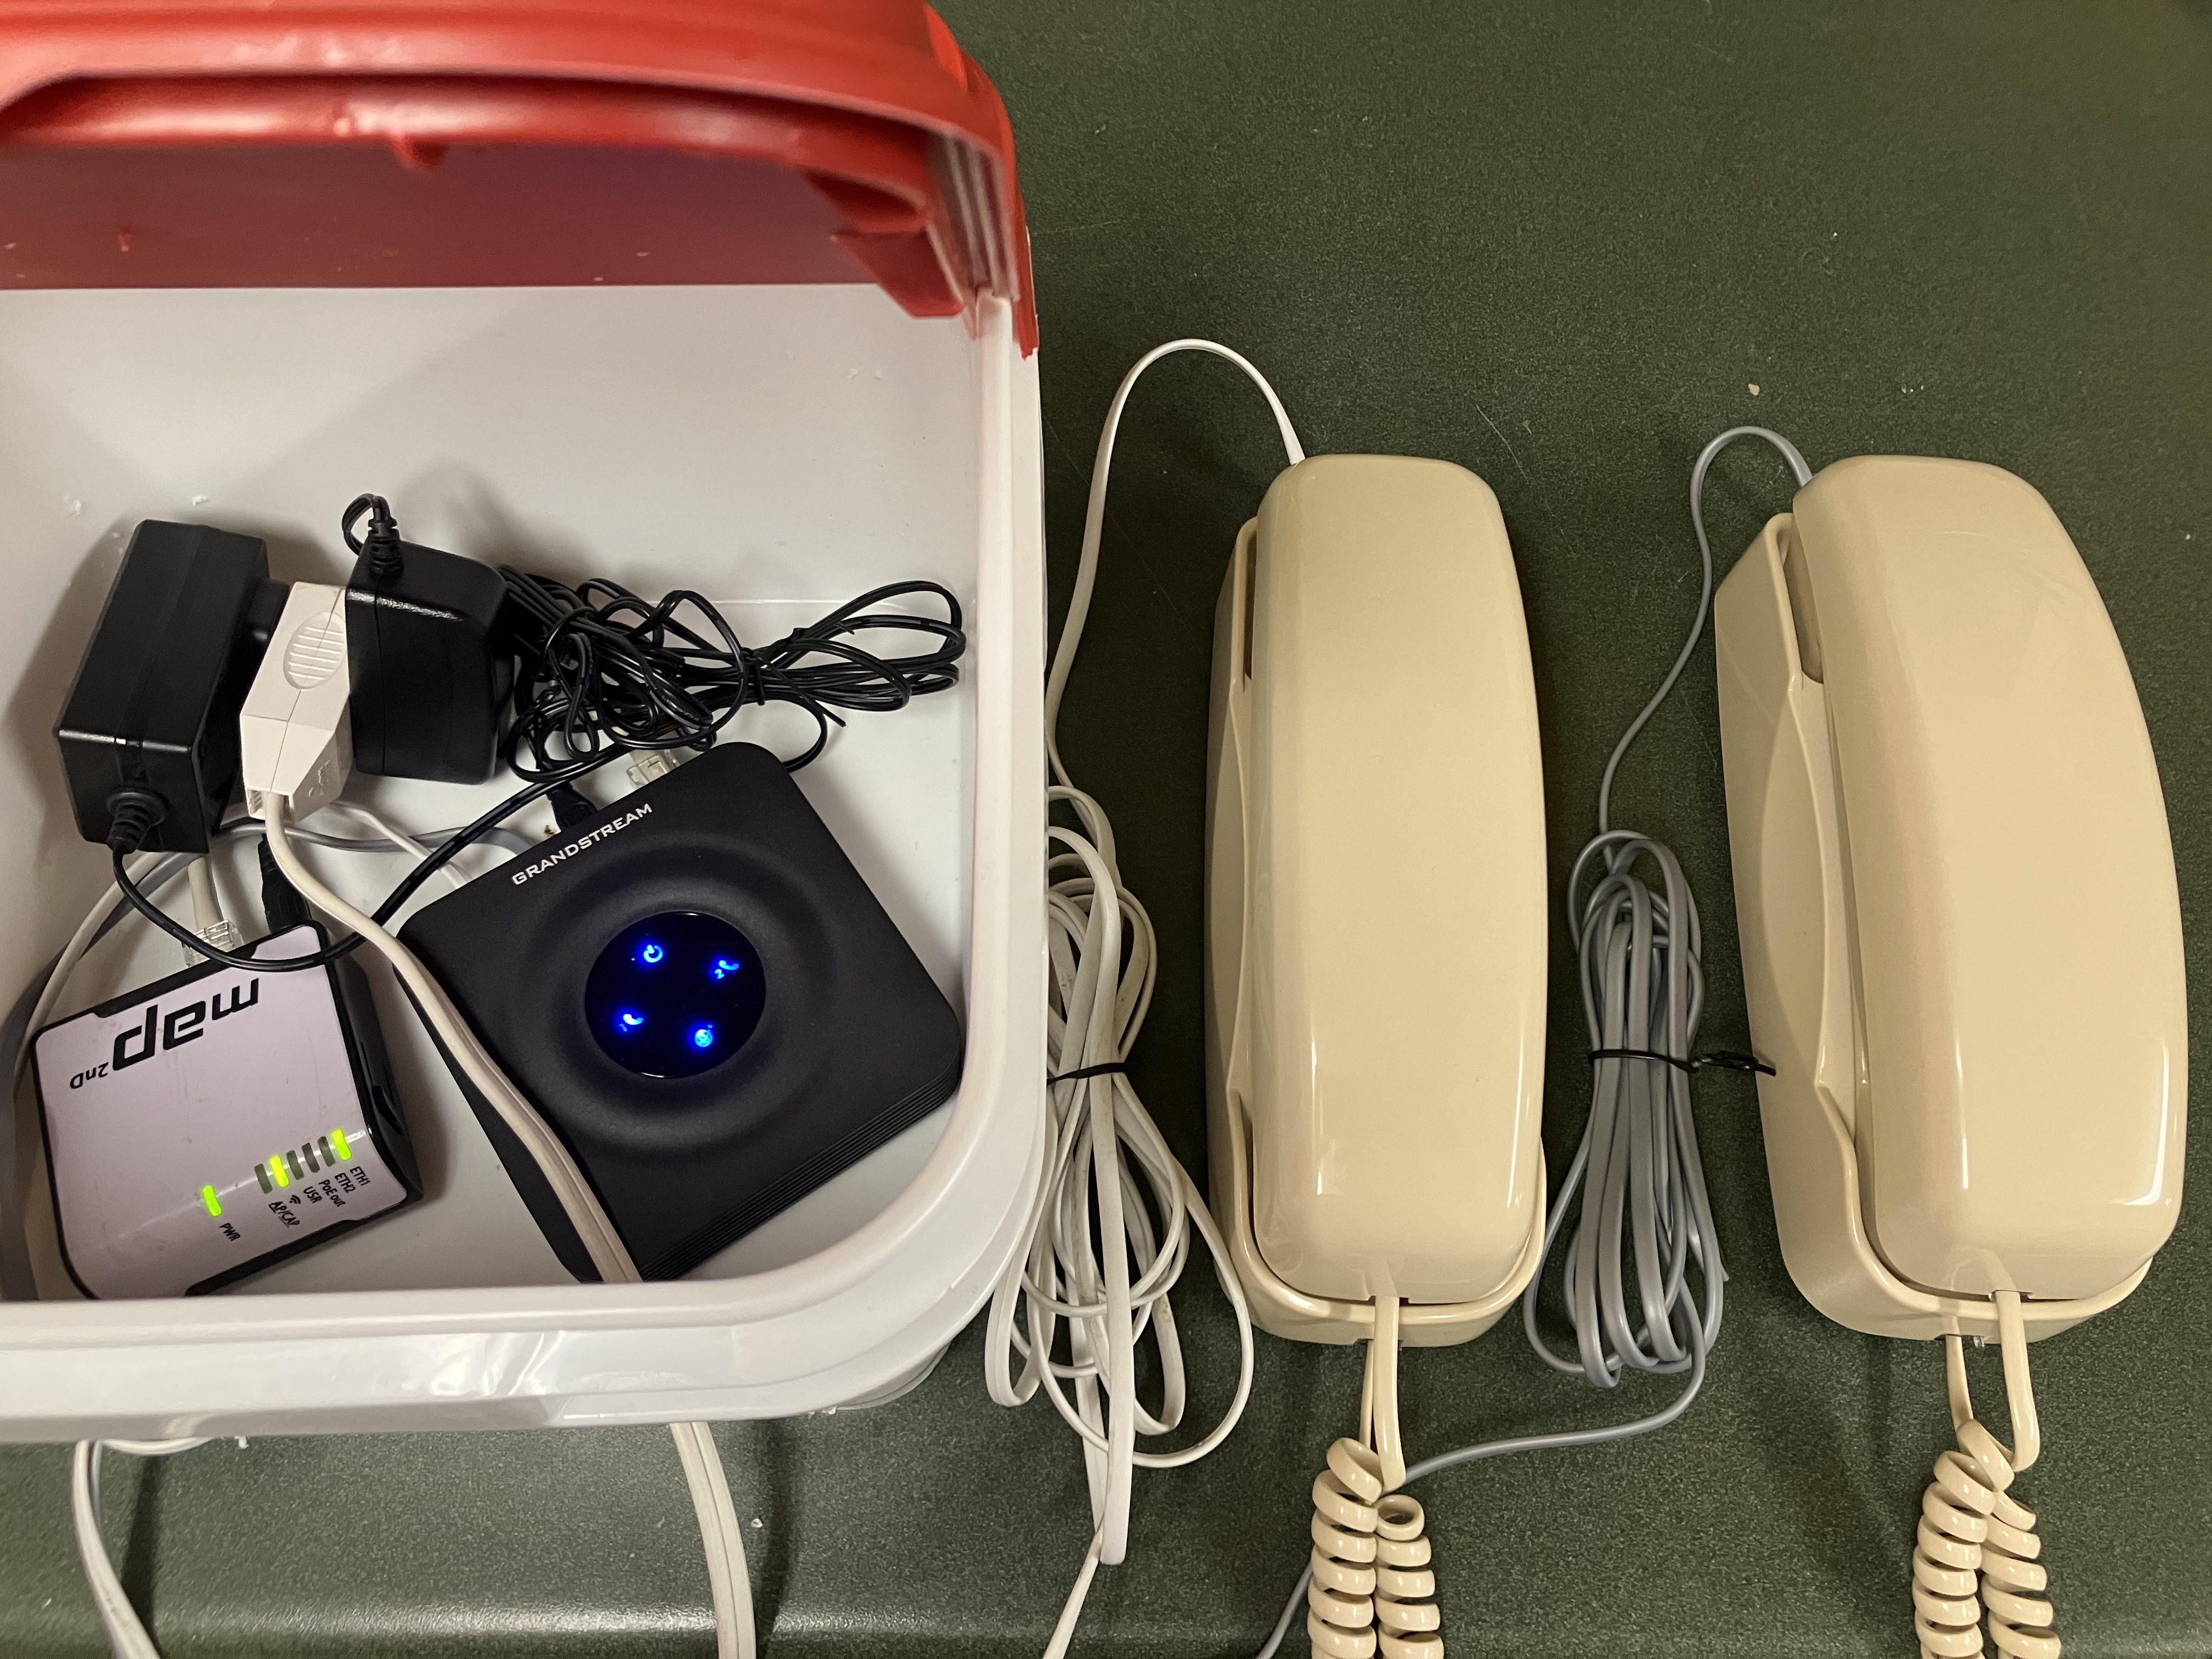
Then we ship the assembly to the shelter, with instructions to plug it in and test it. On occasion, we have needed to attend the shelter location to troubleshoot the wireless connection; this is how we were led to learn about wireless modes in the MikroTik.
Sometimes the handsets are stolen, and we replace them. Should the whole assembly be stolen, we change the passwords on the subaccounts on VoIP.ms, replace the kit, and start over.
Enhancements
We have experimented with remote management of the ATA and mAP devices. The MikroTik can make a VPN connection, giving us access to the administration interfaces of the devices. It’s a nice-to-have and good skill building, but more challenging than valuable in practice. If we’re curious whether the phones are functioning, we can look at VoIP.ms’ interface. Other than that, we rely on shelter staff to tell us how the phones have been received.
The phones are a crucial link, and a small element of dignity, but they’re also a bare minimum, a shared phone with limited functionality in an exposed place. It would be wonderful to offer something like CBRS, small-cell LTE phone service with a small but useful coverage footprint near shelters and/or in a downtown core. Shelter residents and street-involved people could use post-market cellphones in a natural and intuitive way. Many dozens of viable phones come through our door each year for recycling, and the radio base station equipment is affordable. The biggest challenge, as always in Canada, is radio spectrum allocation, or, more properly, the public processes surrounding it.
Conclusion
The “payphones” are well used, according to the VoIP.ms statistics. We know that shelter residents use public phone services to keep in touch with family, and for seeking work or for dealing with bureaucracy, including involvement with government offices or the courts. The latter need has, in other contexts, shown it’s challenging and important to get DTMF tone handling correct for IVR menus.
Arthur C. Clarke imagined the end of long-distance tolls, and it’s somewhat come to pass: compared to food and warmth, the cost of providing telephone service to shelter residents is tiny. It’s valuable for residents to access it, and it’s rewarding for us to make it available.
Acknowledgements and thanks to the I.T. team, past and present, of The Working Centre for collaborating on this design.
Appendix: ATA Settings (Oversize Screenshot)
